Have you ever wanted to bring a bit of the tropics into your home? Golden Goddess Philodendron is a stunningly beautiful evergreen plant that can add a bright and vibrant touch to your living space.
But how do you propagate it? In this step-by-step guide, we will explain what Golden Goddess Philodendron is, what you need to propagate it, and how to go about doing it.
So if you want to take your green thumb to the next level, read on to learn more about how to propagate Golden Goddess Philodendron!.
Table of Contents
Short Answer
Propagating golden goddess philodendron is easy and can be done in a few simple steps.
First, snip off a stem with a pair of clean, sharp scissors or garden snips.
Then, place the stem into moist soil and lightly cover the top with more soil.
Make sure the soil is moist, but not soggy.
Finally, put the pot in a warm, indirect light area and water regularly.
What is Golden Goddess Philodendron?
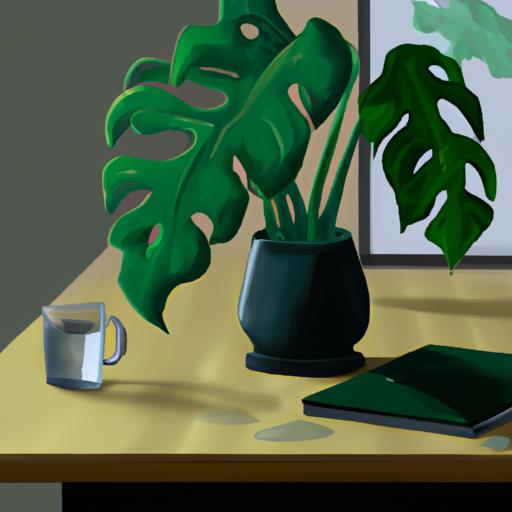
Golden Goddess philodendron (Philodendron bipinnatifidum) is a type of tropical houseplant that is easy to care for and propagate.
This type of philodendron, also known as lacy tree philodendron, has glossy, deep green leaves that are divided into two lobes, giving the plant a unique, lacy look.
It is an evergreen perennial and can reach heights of up to 6 feet.
The leaves of the Golden Goddess philodendron can grow up to 18 inches long, providing a lush look for any space.
It is a popular houseplant due to its hardiness and ease of care.
With proper care and attention, you can propagate this plant with relative ease.
What Do You Need To Propagate Golden Goddess Philodendron?

When it comes to propagating Golden Goddess Philodendron, you will need a few essential items to get started.
The most important item you will need is a healthy stem from the parent plant.
This stem should be about eight to ten inches long and have at least two to three leaves.
You should also remove the leaves from the bottom third of the stem to make it easier to insert into the potting mix.
Additionally, you will need a potting mix or soil that is well-draining and has plenty of organic matter.
A pot or container that is wide and shallow is also needed, as it will provide the best drainage for your new plant.
You may also want to have a spade or trowel on hand to help mix the soil and make sure the stem is firmly planted in the mix.
Finally, you will need a warm, bright spot to place the pot, such as a windowsill or a bright corner of the room.
Step 1
Propagating Golden Goddess philodendron starts with selecting a healthy stem from the parent plant.
It is best to choose one with a few leaves and that has not flowered yet.
Carefully cut the stem at a 45-degree angle and remove the leaves from the bottom third of the stem.
This will encourage new roots to form.
Once you have the stem, the next step is to prepare a pot filled with well-draining potting mix.
Make sure the pot is deep enough to accommodate the stem.
Place the stem in the pot, making sure the cut end is pointing downwards.
Water the soil lightly, ensuring it is moist but not soggy.
Now it is time to find the right spot for the stem to grow.
The Golden Goddess philodendron prefers warm, bright spots for optimal growth.
Make sure the area is not too hot or too cold and that it receives plenty of indirect sunlight.
Once the stem is in place, all that is left is to wait for the new growth to appear.
With proper care and attention, you should be able to see new growth in a few weeks.
Keep the soil consistently moist but not soggy and provide the plant with the right amount of light and warmth and you will soon have a beautiful new Golden Goddess philodendron to enjoy.
Step 2

Once you have cut a healthy stem from the parent plant, the next step in propagating Golden Goddess philodendron is to remove the leaves from the bottom third of the stem.
This will help to ensure that the stem is able to root properly, as the leaves can draw away much-needed energy from the stem.
To remove the leaves, simply use a pair of sharp scissors or gardening shears to cut off the leaves.
Make sure that you are careful not to damage the stem when cutting off the leaves.
Once the leaves have been removed, you can move on to the next step in the propagation process.
Step 3
Once you have the cutting prepared and in the pot, the next step is to make sure your new Golden Goddess philodendron is in the right environment.
Place the pot in a warm, bright spot, such as a windowsill, where it will have access to indirect light.
Make sure the area is away from any direct sunlight, as this could damage the delicate foliage.
Additionally, keep the soil consistently moist but not soggy, and water the pot whenever the top inch of soil feels dry.
With proper care and attention, your new Golden Goddess philodendron will soon begin to flourish.
New growth should be visible in a few weeks.
Its important to note that propagating Golden Goddess philodendron doesnt always result in success.
If the stem doesnt take root or the plant fails to thrive, dont be discouraged.
Take the time to diagnose what went wrong, and try again with a fresh cutting.
With a little patience, youll soon have a healthy, thriving Golden Goddess philodendron.
Step 4

Once the stem has been placed in the pot and the soil is consistently moist, it is important to provide the cutting with the proper environment to encourage new growth.
Place the pot in a warm, bright spot.
A south-facing window with direct sunlight is ideal for growing Golden Goddess philodendron.
If direct sunlight isnt available, you can use indirect light or even artificial lighting.
Make sure to rotate the pot occasionally to ensure the stem is receiving light evenly.
Keep the soil consistently moist but not soggy.
Use a spray bottle to water the soil and keep it from drying out.
Also, check the potting mix periodically and adjust it if necessary.
You may need to add more soil or drainage material if the potting mix becomes overly wet or dry.
Finally, be patient! It can take a few weeks for new growth to appear, but when it does, youll be able to enjoy the lush foliage of your newly propagated Golden Goddess philodendron.
With proper care and attention, you can easily propagate Golden Goddess philodendron and enjoy its lush foliage.
Step 5
Once the Golden Goddess philodendron has been planted, the next step is to give it the proper care and attention it needs in order to thrive.
This includes providing adequate light, water, and fertilizer.
Place the pot in a warm, bright spot and make sure it receives enough light to encourage the growth of new leaves.
Keep the soil consistently moist but not soggy by watering it regularly.
Its also important to fertilize the plant every month to ensure it has all of the necessary nutrients it needs to thrive.
With proper care and attention, your Golden Goddess philodendron will thrive and produce lush foliage.
Final Thoughts
Propagating a Golden Goddess Philodendron is a simple and rewarding process.
With the right care and attention, you can easily enjoy its lush foliage.
Now that you know how to propagate this popular houseplant, why not give it a try? You’ll be amazed at how quickly it grows and flourishes with the proper care.